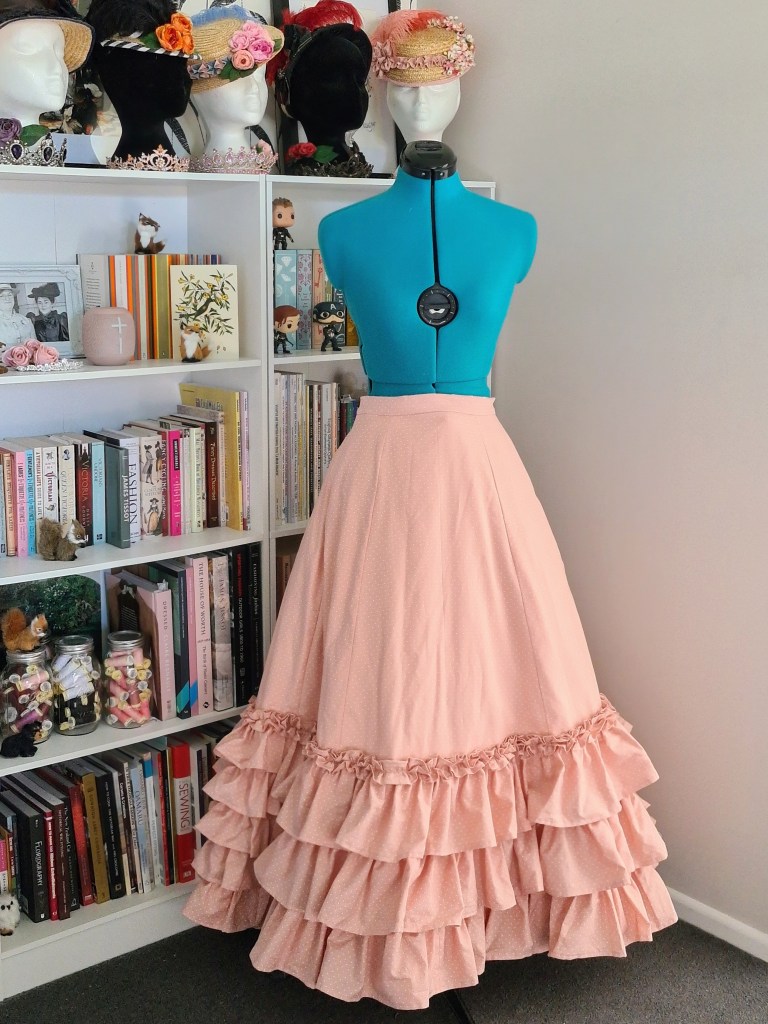
You will have seen my post about the hat I made for the Cherryblossom Dress, and now here is a post about the first garment completed – the very ruffly Underskirt!
When I first started working with my fabric for the Cherryblossom Dress I knew that it demanded ruffles and definitely not pleats – which is so often my go-to for my projects. As I began mulling over the height/depth and number of the ruffles I wanted to use for the underskirt I looked to the internet for ideas and inspiration. I found myself stumbling across images I had looked at when planning my Pretty Princess Dress, and again began leaning towards a different front and back – this time with rows of ruffles in the front instead of the pleats that I had gone with for that project.
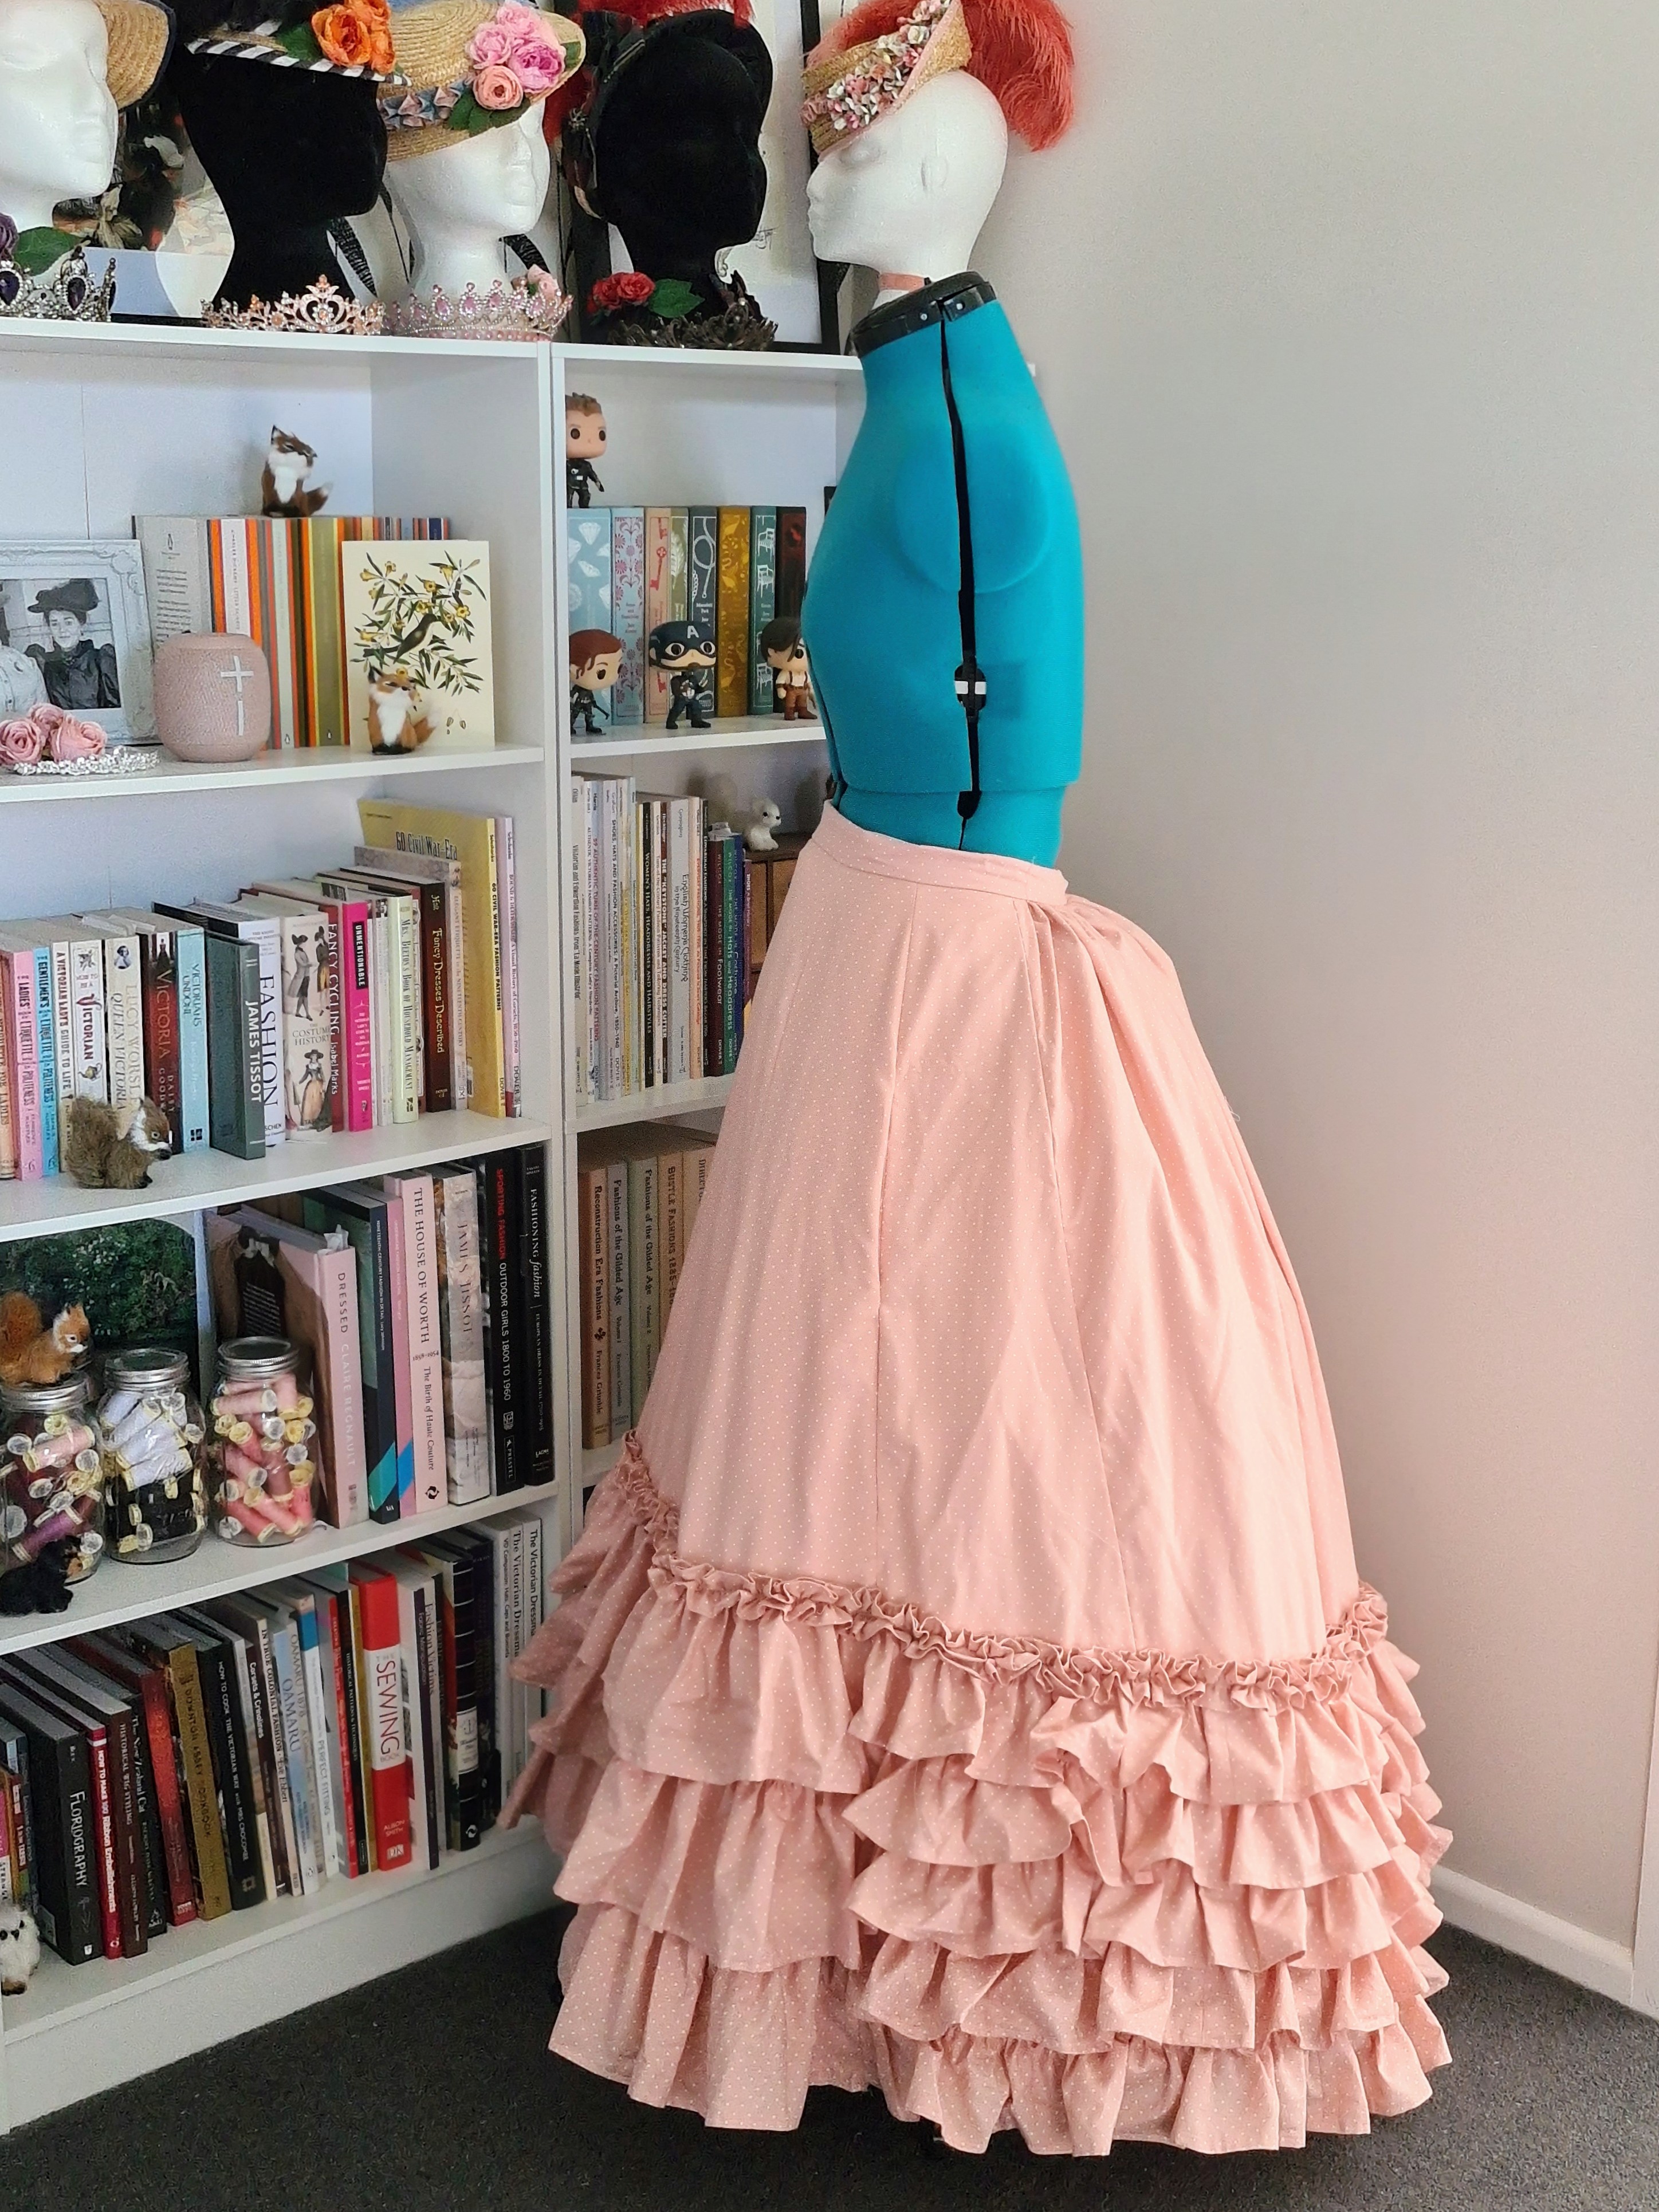
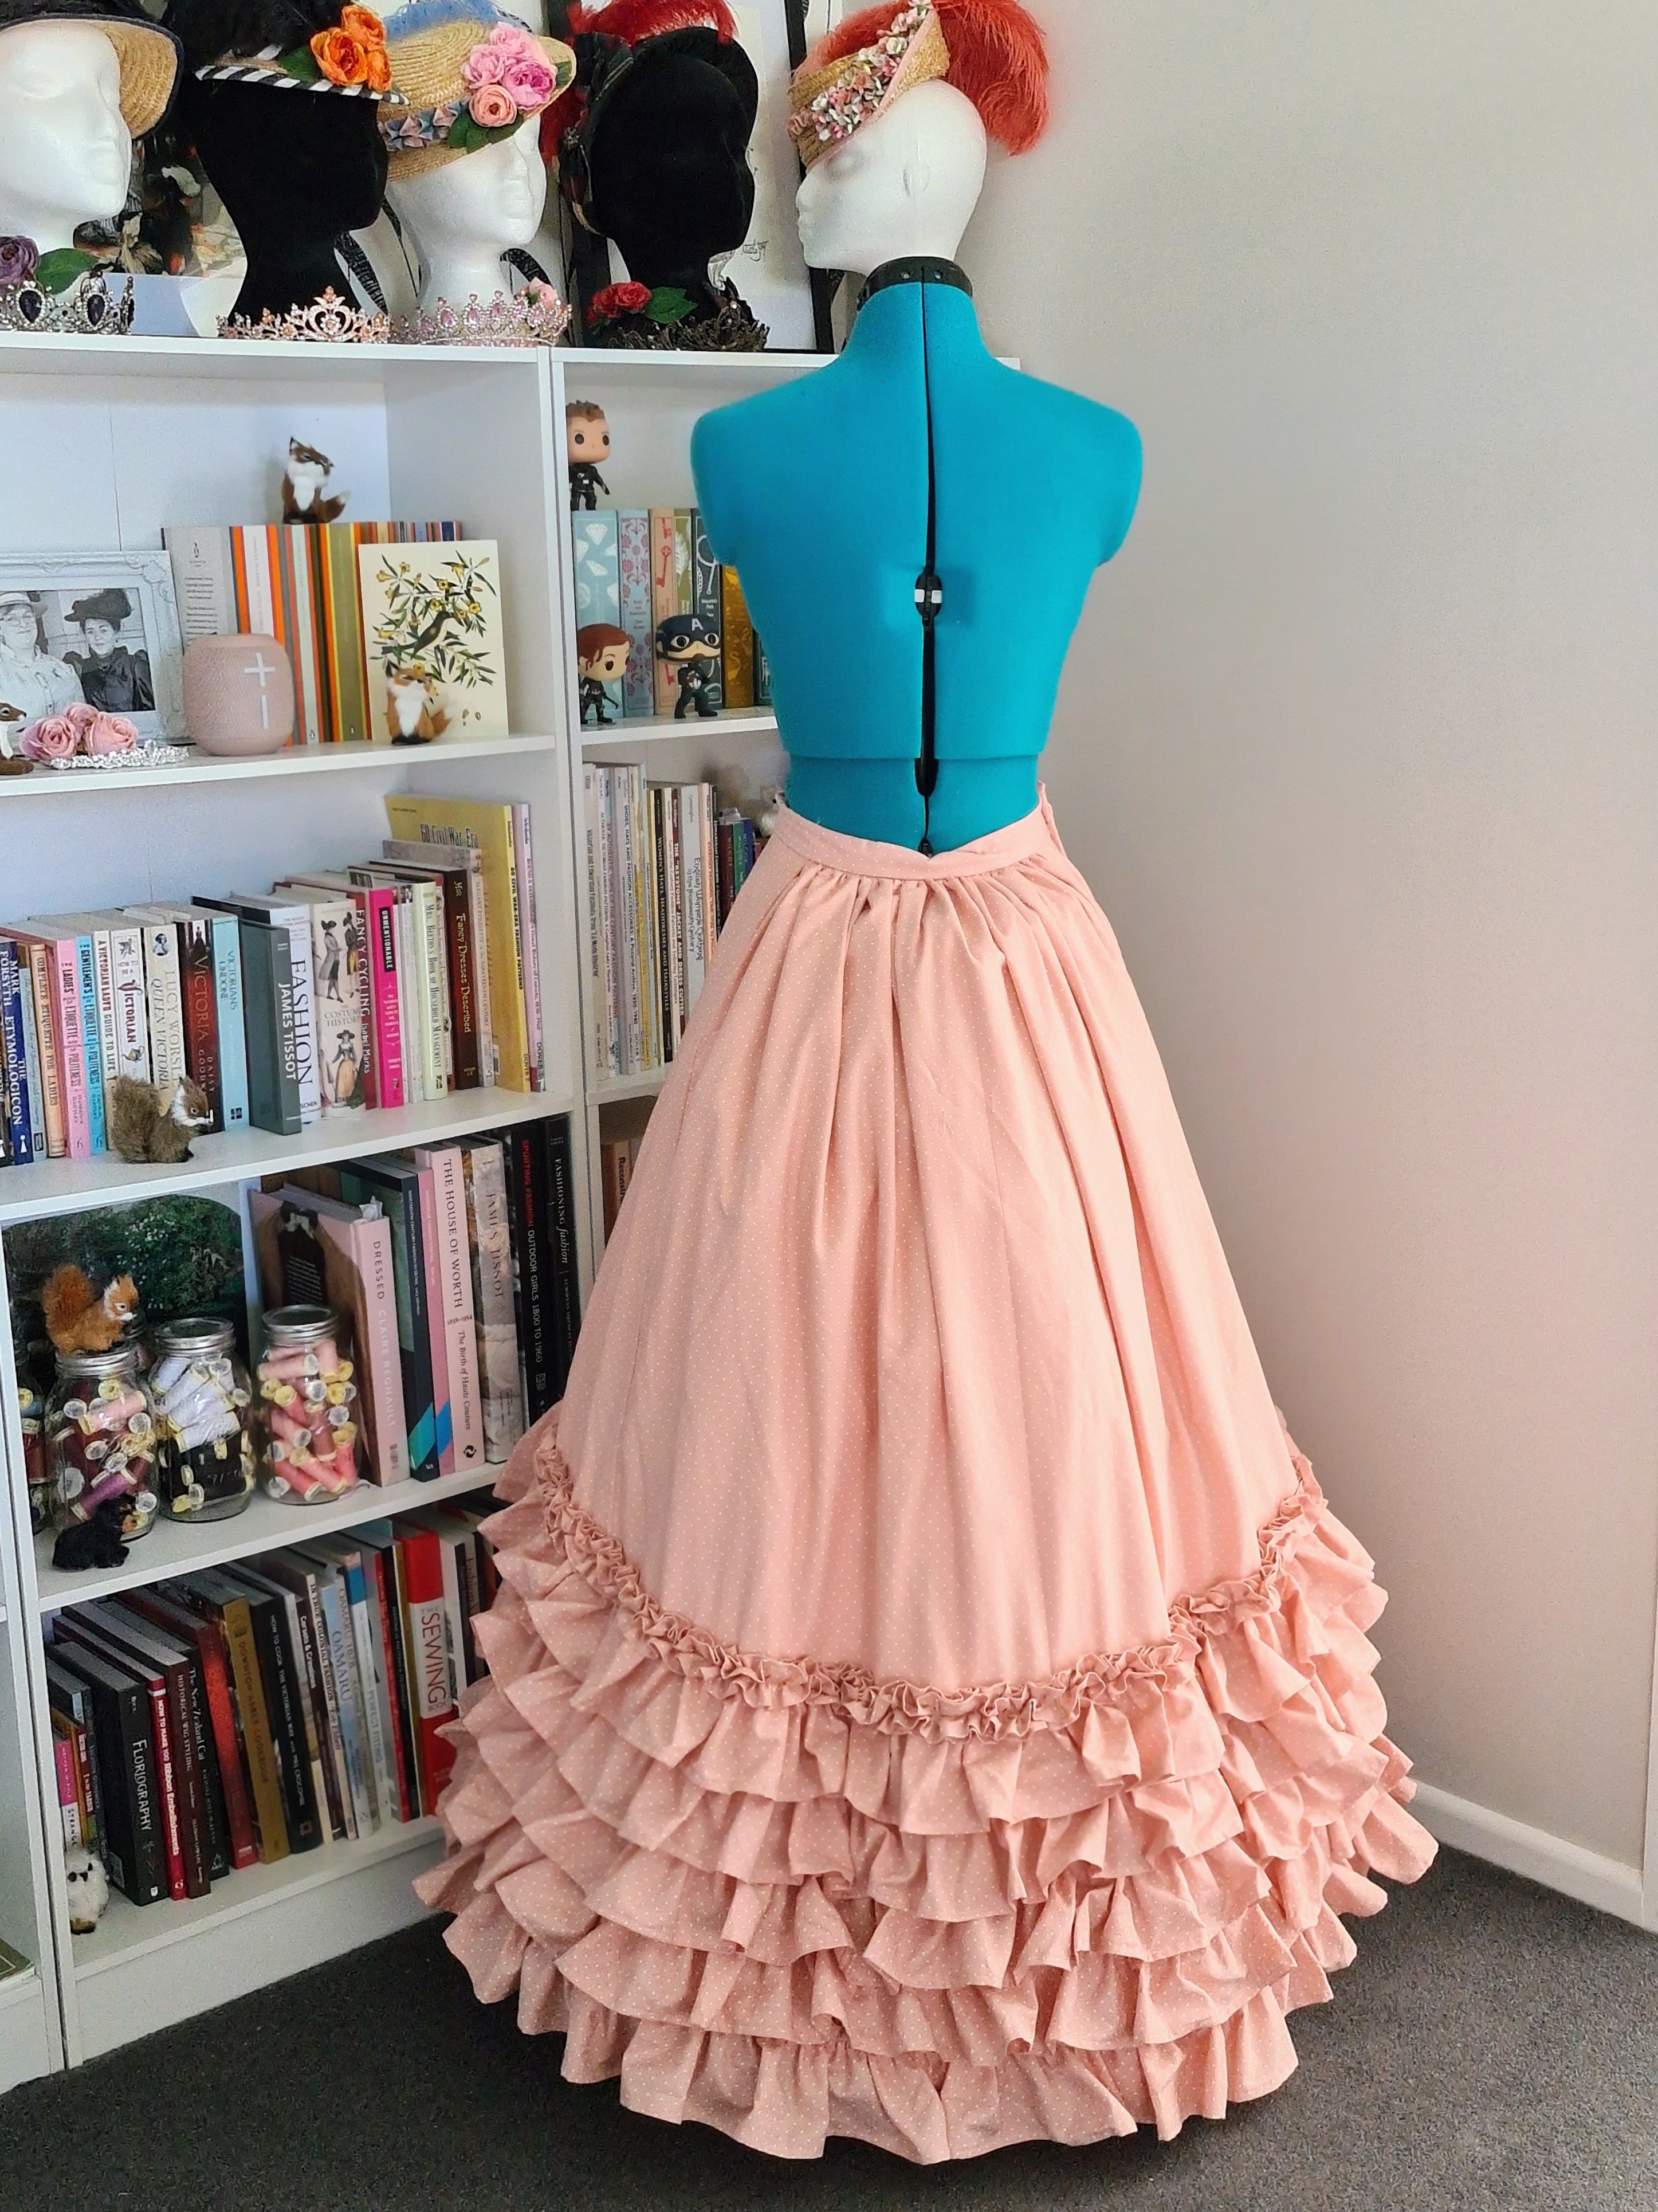
Things get a little bit muddled in the construction of a skirt when you want the front and back trims to be different. You can’t follow the usual route of making the skirt, adding the hem facing, placket, waistband, and then attaching the trim. It ends up being more a case of sewing the front and side fronts together, adding the trim to that section, then repeating that process for the back and side back pieces.
I didn’t take a picture of either the front section or the back with the ruffles attached, but I did photograph my process for the Pretty Princess Underskirt.
Once the two sections had all their ruffles sewn on, I joined the front and back together, making sure that I included a pocket. I usually avoid pockets because – as much as I love them – my first attempt wasn’t all that pretty and it put me off trying again. This time around, however, I had much better success with the pocket so I’m glad I gave it another shot.
Fortunately, thanks to my rudimentary mathematical skills (and very lucky guesswork), the top of the front and back ruffles matched up at the seams. To add a bit of continuity, I added a ruffled strip of fabric all the way around after adding the hem facing, sewing the top section to the flatlining fabric only by hand.
The placket and waistband were the last things to do. I usually pleat the fabric at the back to fit the waistband, but this time I decided to see what happened if I gathered it instead. I think it looks like it keeps it softer and in the same vein as the ruffled trims.
It feels like it has been a very long time since I’ve been able to say ‘yay, I’ve completed something’ as this year has been rather all over the place and ridiculously stressful so I haven’t had much energy to achieve a lot. I think I’m starting to get back into the swing of things, and now I’m able to ride that ‘I made a thing! Let’s make another thing!’ feeling.
So, watch this space for the next part of the Cherryblossom project ☺️

One thought on “Cherryblossom Dress: The Underskirt”