As always when starting a new silhouette one needs to start from the skin out. So, for my first foray into the Eighteenth Century, that’s where I started. Rather boldly too, in lolly pink. After all, who says that underwear has to be boring?
I used the American Duchess Simplicity pattern 8162 for the stays because it’s just a lot easier to have front and back lacing stays when you’re dressing yourself. For the shift and panniers, I used the other pattern 8579.
The shift went together quite quickly though I probably should have chosen the next size down as it’s a little too big but I’ll get around to altering that later. Making the stays was a bit of a learning process as, while it’s reasonably similar in concept to a corset, it’s different enough for me to have to stop and think. It also involves sewing So Many Straight Lines…
After making a mockup to check sizing, and to become a bit more familiar with the pattern and how it went together, I cut out the coutil and slowly began the construction process.
Because I opted for fully boned stays I had to figure out the boning channel pattern to use and drew them onto the coutil. I then pinned the pieces onto the lovely lolly pink broadcloth to cut that out – similar to flatlining although I only stitched down the side of each piece.

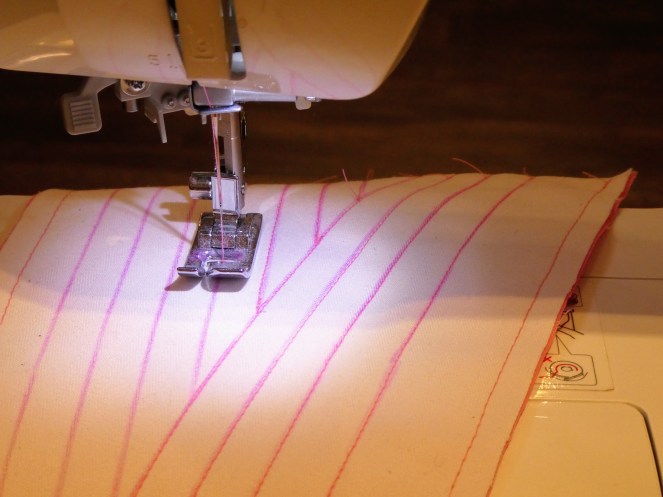
Then came the fun of sewing So-Many-Straight-Lines for the boning channels. This was a very repetitive process and I ended up stealing a few minutes before work each morning to sew a couple of channels. It didn’t take long for the stays to start reminding me of pink wafer biscuits and to start craving strawberry milk.
With the boning channels finished, I moved on to the eyelets and joining the pieces together. I soon had both halves of the stays, flat and shapeless, waiting for the bones to give it some life. Using synthetic whalebone, I didn’t think that it would take too long to cut the lengths, file the ends and slip them into the channels but I was wrong. Several hours (and a whole lot of plastic dust mess) later I’d finally finished. Okay, it probably wouldn’t have taken quite as long if I hadn’t also been binge-watching The Flash.


How amazing to see the difference the bones made to the stays once they had been added. Like they had had life breathed into them. Of course, because of the curve in the bones after being stored on a roll meant that while they were now 3D, they certainly weren’t body shaped. Fortunately, synthetic whalebone moulds to your body shape with body heat so I just had to wear them for a while so the stays could learn what their true form should be.

I handstitched bias tape over the seam lines and also bound the seam allowances because I managed to get myself in a muddle over the lining and didn’t end up adding it when I should have. I’m probably not going to be wearing these stays more than once or twice a year so I’m hoping that I can get away with it. Then it was time to bind the top and bottom edges of the stays and, my goodness, binding the top was so much easier than trying to negotiate all of the corners and turns of the bottom edge.


The process definitely took longer than I thought – perhaps because I ended up doing a lot more by hand than I thought I was going to. I’m pretty happy with the way that they’ve turned out but I probably should have made it a little smaller as it closes fully and doesn’t feel quite as secure as it might. But, that might just be because I’m much more used to a Victorian corset.

The next step was to build some hips and to make up the panniers. Because I like things that match I made these from the same lolly pink broadcloth as the stays. The instructions were pretty easy to follow but, as I always do, underestimated how long it would take to put them together. I think that had more to do with the fact that you’re making two and not one.
I cut the pattern pieces out and sewed them together according to the instructions. I probably got a little too excited about the fact that there were pocket slits (dresses with pockets are the best ever), as I was in the middle of embroidering a pair of pockets at the same time.


The twill tape was fairly easy to sew on to create the boning channels and then I got to make more plastic dust mess by cutting and filing the 12mm synthetic whalebone that I used. Again, it was so exciting to see the panniers transform into a three-dimensional shape but that made it a little trickier to handle while hemming the sides of the panniers, sewing on the twill tape straps, and the waistband. I’m not so thrilled with the width of the tapes that adjust the shape of the panniers and will probably look at replacing them with a thinner twill tape later on. They just feel a bit bulky at the minute.


While there are a few things that I’d like to change, the undergarments were complete! The structural foundations were finally done, ready to support the Robe a la Francaise, which I had been impatient to get started on. I’m still working on it at the moment, trying to keep calm as Bastille Day is no longer sneaking up on me but barreling towards me like a runaway horse and carriage!
")


You’ve done an absolutely incredible job! This looks great
LikeLiked by 1 person
Thank you so much 😊😊
LikeLike
Excellent job!
LikeLiked by 1 person
Thank you so much! 😊😊😊
LikeLike